Introduction
As noted previously, I recently rehosted this blog on Google’s App Engine (GAE). Writing a small, but functional, blog engine is a useful exercise in learning a web framework. I wrote blog software to learn more about Django, and I ported it to App Engine to learn more about App Engine.
In this article, I recreate the steps necessary to build a blogging engine that runs under GAE.
Acknowledgments
I’m grateful to the following people for reviewing and commenting on this article before I published it.
In addition, the following people sent me some valuable insights and corrections after the article was published:
- Bill Katz, for clarifying the querying of list properties.
- Fernando Correia, for reminding me that unique keys do have associated unique IDs, forcing me to re-read that part of the GAE docs again.
- Alexander Kojevnikov, for clarifying that the GAE user API works with
Google accounts, not GMail accounts. (The difference is that a registered
Google user need not be a GMail user.) Alexander also pointed out that
Query.fetch(1)can be more simply expressed asQuery.get(). - Mark Lissaman, for pointing out a semantic error in the
picoblogcode.
Similar Articles and Software
- Experimenting with Google App Engine, by Bret Taylor. Also describes building a blogging engine on GAE.
- Bloog, Bill Katz’s RESTful GAE blogging engine.
- cpedialog, another GAE-based blogging engine.
Caveats
Before I jump into the tutorial, there are a few caveats:
- The point of this article is to build an App Engine application, to get to know some GAE internals. If you just want to host a blog on GAE, and you’re not interested in understanding the software involved, you might consider installing cpedialog, a blogging engine that will run on GAE.
- I am certain there are things about GAE that I could do better. I welcome corrections and suggestions; just drop me an email.
What this Blog Engine Supports
The blog engine outlined in this article is fully functional; this blog runs on similar software. However, it lacks a few features some people might want, such as:
- Image uploading. I just haven’t put that in yet. When I do, I’ll update
this article. In the meantime, I’m able to live without it by uploading
the images via GAE’s
appcfg.py updatecapability. - Comments. It’s easy enough to drop Disqus into your templates, if you want.
- Integration into blog aggregators like Technorati. (There’s a follow-up article on this topic.)
It does have the following features, though:
- Tag handling, including support for generating a tag cloud.
- Support for RSS and Atom feeds.
- Displaying articles by month or tag.
- Template-driven theme customization.
- Unpublished drafts.
- Secured administration screens.
- reStructuredText markup (instead of HTML) for the articles.
In short, it’s a serviceable blog engine, with simple, straightforward code you can customize as you see fit.
The Code
The source code for this blog engine is available on GitHub. See the Picoblog web page, at http://software.clapper.org/picoblog/
Get Going with App Engine
Register and Download
First, of course, you have to register with GAE and download the development kit. This article assumes you’ve already done that.
Create your Application
Next, from your GAE account, create a new application. You’ll have to create a unique identifier for the application. In this article, I use the application ID “picoblog”. You’ll want to use something else.
This article is not a tutorial on how to use the App Engine tools and web site; it’s an article about building a blog application. So, I’m not to go into details about how to create your application on the GAE site. Google’s wizard is easy enough to follow.
Open the App Engine Docs
You’ll want to have the online App Engine documentation available as you develop your App Engine application. It wouldn’t hurt to review the Getting Starting section before jumping in.
Create your Local Application Directory
Create a directory called picoblog in which to do your work. In
that directory, create a file called app.yaml:
1 2 3 4 5 6 7 8 9 10 11 12 13 14 15 16 17 18 19 20 21 22 23 | |
This file configures your application. You can treat most of the top of the file as magic. For now, the parts we care about are:
:application: The application’s registered ID is “picoblog”.
:handlers: Each url entry is a regular expression GAE will match
against incoming URL requests; on a match, it’ll run the
associated script. In this case, we’re saying:
Any path starting with
/staticis resolved via the built-in static file handler. This is where we’ll put our images. So go ahead and create astaticdirectory underpicoblog.Since browsers always look for
/favicon.ico, and I get tired of seeing all the “not found” messages in the logs, there’s an entry for an icon. It’s stored in thestaticdirectory.The administrative screens (for creating and editing blog articles) live under ‘/admin’ and are secured: Only a Google account with administrative privileges on the project is allowed to get to them. They’re handled by the
admin.pyscript. We’ll be creating that script in thepicoblogdirectory.Finally, the published blog itself matches everything else, and it’s handled by the
blog.pyscript. That script, too, will end up in thepicoblogdirectory.
Once you’ve created app.yaml, you can pretty much forget about it
for awhile.
Create the Data Model
The next step is to decide what data we’re storing in the database. For
this blog engine, there’s a single object type in the database, called an
Article. It has the following properties (which would be columns in a SQL
database):
title: The 1-line title of the articlebody: The body of the article, which is reStructuredText markup.draft: Whether or not the article is a draft (i.e., not published) or not. Drafts are only visible in the administration screen.published_when: The time the entry was published. In this context, “published” means “goes from being a draft to not being a draft”. This time stamp is initialized to the time the article is created, and it’s updated when the article is saved as a non-draft. (Toggling the “draft” flag multiple times will continue to update this time; you’re obviously free to change that behavior by hacking the code.)tags: a list of tags (strings) assigned to the articles. May be empty.id: a unique ID assigned to the article.
A note about the unique ID: GAE does not provide support for an
automatically incremented integer ID field the same way that Django does.
An item in the datastore does have a unique key, accessible via the
key() method. Further, that key can be converted to a corresponding
unique name or number (depending on how the key was assigned) by calling
key().id(). For instance:
1 2 3 | |
However, you cannot use this ID in a query. Quoting from the Keys and Entity Groups section of the GAE documentation:
Key names and IDs cannot be used like property values in queries.
However, you can use a named key, then store the name as a
property. You could do something similar with numeric IDs by
storing the object to assign the ID, getting the ID value using
obj.key().id(), setting the property with the ID, then storing the
object again.
So, that’s what we’re going to do.
The data model for our Article class looks like this:
1 2 3 4 5 6 7 8 9 10 11 12 | |
If you’re familiar with Django, you’ll notice that it’s similar to Django’s data models, but not exactly the same.
Next, since I like to hide as much of the database API semantics inside the
model, I’m going to add a get_all() method that returns all articles, a
get() method that returns a single article by ID, and a published()
method that returns all non-draft articles. (The published() method will
be separated into two methods, so the query itself can be shared. More on
that later.)
1 2 3 4 5 | |
1 2 3 4 5 | |
1 2 3 4 5 | |
1 2 3 | |
FETCH_THEM_ALL is an integer constant with a large value, defined
at the top of the module.
NOTE: In the original version of the code, and in the zip files posted
to the web site, FETCH_THEM_ALL is defined as follows:
1
| |
On a 64-bit local machine, sys.maxint will evaluate to a 64-bit number.
But GAE is a 32-bit environment, so the code may fail on certain machines.
The code in the GitHub repository has been corrected.
For a more complete understanding of the GAE query interface, see the documentation for the Query class and the GAE Query Filter documentation.
Finally, let’s add a save() method that does two important things:
- Copies the GAE-assigned unique ID into our
idfield, so we can use it in queries. - Updates the time stamp if the article being saved is going from draft to published status.
1 2 3 4 5 6 7 8 9 10 11 12 13 14 15 16 17 18 19 20 21 22 23 24 25 26 | |
Okay, that’s the model. (See the source code for the complete file.)
Create the Administration Screens
Now let’s create the administration screens, so we can edit and create articles. We’ll create two screens.
The main administration screen contains three things:
- A button to create a new article. Pressing this button creates an empty article and launches the Edit Article screen to edit it.
- A button to go back to blog itself.
- A list of the existing articles. The articles will be sorted in reverse chronological order, and each article’s date and title will be displayed. The article’s date and title will also be a hyperlink to the edit screen for the article. Further, drafts will be shown in red, to distinguish them from published articles.
The Edit Article screen contains
- A text box for the the title
- A text area for the body of the article, which is assumed to be reStructuredText
- A text box for the list of tags (comma-separated)
- A check box to indicate whether or not the item is a draft
To create these screens requires five files:
defs.pywill hold some constants that we share between all the blog scripts.request.pywill hold a base class request handler, which is basically a place to hang logic that we need in every script.admin.pycontains the Python code for the admin screens–the equivalent of a Djangoviews.pyfile for the admin screns.admin-main.htmlis the template for the main administration screen.admin-edit.htmlis the template for the Edit Article screen.
To keep things organized, we’ll store the templates in a templates
subdirectory.
The Templates
Let’s start with the templates.
GAE’s default template engine is Django’s template engine. If you don’t know Django’s template language, read the first few sections of the Django template language document. Describing Django templates is beyond the scope of this article.
Main Administration Screen Template
You can see the full template for the main administration screen here.
It consists of a link to the style sheet, some Javascript, some standard HTML layout, and this block of template logic:
1 2 3 4 5 6 7 8 9 10 11 | |
This template code assumes that the variables passed to the template will
include a Python list called articles, each element of which is an
Article object. We’ll see how that’s populated in the next section.
The style sheet link looks like this:
1
| |
Rather than use a template Include file '"style.css"' contains invalid characters or sequences directive to
pull the style sheet file inline at rendering time, we’re telling
the browser to go get it. We’ll be using the same style sheet for
all pages; using an external style sheet allows the browser to
cache it.
The Style Sheet
To see the style sheet, follow this link. The style sheet is stored in
the static subdirectory, where it’ll be served by the GAE static file
handler.
The Edit Screen Template
The template for the edit screen is available here. The edit screen is slightly more complicated, since it has some Javascript to handle the various buttons. But overall, it’s still pretty simple as web screens go.
The View Code
The view code for the administration screens is in admin.py. It,
too, is relatively simple. But first, let’s look at the two other
files we’re using to consolidate common logic.
defs.py
defs.py just contains some common constants:
1 2 3 4 5 6 7 8 9 10 11 12 13 14 15 | |
We’ll see how they’re used as we get further into this tutorial.
request.py
request.py contains our base request handler class:
1 2 3 4 5 6 7 8 9 10 11 12 13 14 15 16 17 18 19 20 21 22 23 24 25 26 27 28 29 30 31 32 33 34 35 36 37 38 39 40 41 42 43 | |
As you can see, it just contains some methods to make rendering templates a little simpler.
admin.py
Now we’re ready to look at the administration view code. First, we have some imports:
1 2 3 4 5 6 7 8 | |
These are followed by the request handler classes:
1 2 3 4 5 6 7 8 9 10 11 12 13 14 15 16 17 18 19 20 21 22 23 24 25 26 27 28 29 30 31 32 33 34 35 36 37 38 39 40 41 42 43 44 45 46 47 48 49 50 51 52 53 54 55 56 57 58 59 60 61 62 63 64 65 66 67 68 69 70 71 72 73 74 75 76 77 78 79 80 81 | |
The file ends with some initialization logic and the main program:
1 2 3 4 5 6 7 8 9 10 11 12 13 14 15 | |
Let’s break this down a bit. First, the initialization logic at the bottom
(that is, the creation of the webapp.WSGIApplication object) defines what
classes (handlers) will handle which URLs within the /admin/ URL space.
Recall that the app.yaml file points all /admin URLs to this file.
The application variable further breaks those URLs down, so that certain
URLs map to certain handlers. The list passed to the WSGIApplication
constructor contains tuples; each tuple defines a URL mapping.
- The first element of the tuple is a regular expression. Note that the
regular expressions we’re using end with
/?, allowing the trailing slash to be omitted in the URL. - The name of the class that will handle requests to URLs that match the regular expression.
Next, let’s look at some of the handlers. There are basically two kinds of handlers here:
- Handlers that just display a page (i.e., retrieve data from the database and stuff it into a template).
- Handlers that process form submissions.
Handlers that Only Display a Page
ShowArticlesHandler, NewArticlesHandler and EditArticlesHandler are
example of handlers that simply display a page. Here’s the
ShowArticlesHandler class again:
1 2 3 4 5 | |
First, because it defines only the get() method, it supports just the
HTTP GET semantics. (POST is not supported for the associated URL.)
The actual handler is simple: It retrieves all articles, whether draft or
published, puts the resulting list in a dictionary, and uses that
dictionary to render the template. That’s it; that’s the entire handler.
The NewArticleHandler is similarly simple.
The EditArticleHandler is a little more complicated, only because it has
to handle a few additional things:
1 2 3 4 5 6 7 8 9 10 | |
First, it determines whether the article being edited is in the database or not; if not, it throws an exception, because it should never be invoked on a non-existent article. (If it is, we have a bug.)
Next, it creates a comma-separated string from the list of tags, so the template can simply stuff that string into the tags edit box.
Handlers that Process Forms
The most complicated handler is the SaveArticleHandler class.
Let’s look at that one again:
1 2 3 4 5 6 7 8 9 10 11 12 13 14 15 16 17 18 19 20 21 22 23 24 25 26 27 28 29 30 31 32 33 34 35 36 37 38 39 40 41 42 | |
That one’s a little longer, but what it does is simple enough:
- First, it retrieves all the form variables.
- Next, if there are any tags in the form, it splits the tag string to make it into a list.
- The tags are actually stored as GAE
db.Categoryobjects, not strings, so the code calls a specialArticleclass method to convert the strings from the form intoCategoryobjects. (Consult the code for that conversion method; it’s trivial, and it’s not included here.) - It processes the Draft checkbox.
- It attempts to load the referenced article. If the article exists, the handler updates its contents. Otherwise, it creates a new Article object with the specified ID.
- Then, it saves the article.
- If the
edit_againrequest variable is set, then the handler redisplays the edit screen; otherwise, it displays the main administration screen again.
That’s it. We’ve finished our admin screens. Let’s take a look at them. To
do that, fire up a terminal window, change your working directory to the
picoblog directory, and run the following command. (You must have put the
root of the unpacked GAE toolkit in your path.)
dev_appserver.py .
You’ll see output something like this:
INFO     2008-08-06 02:51:26,336 appcfg.py] Server: appengine.google.com
INFO     2008-08-06 02:51:26,342 appcfg.py] Checking for updates to the SDK.
INFO     2008-08-06 02:51:26,444 appcfg.py] The SDK is up to date.
INFO     2008-08-06 02:51:26,534 dev_appserver_main.py] Running application
pico on port 8080: http://localhost:8080
You can now surf to http://localhost:8080/admin/ using your browser.
Here’s a screen shot of the main screen, showing several articles. The top-most article is a draft; the rest are published.

The full-size main page image is here
And here’s the edit screen for the draft article:

The full-size edit page image is here.
From a stylistic viewpoint, these screens are really simple. However, making them look fancier and slicker is simply a matter of fiddling with the templates and the stylesheet. The Python code doesn’t change.
The Markup Language
Rather than force the blogger (i.e., you or me) to enter HTML, I’ve chosen to use the reStructuredText (RST) markup language. Of course, this means the blog has to translate the RST text into HTML when someone wants to view the blog. We can either do that conversion when we save the article, or convert on the fly when someone visits the blog.
Converting the markup when we save the article is more efficient, but it means we have to store the generated HTML and reconvert all previously saved articles whenever we change the templates or the style sheet. It’s simpler to convert on the fly. If this strategy ends up causing a performance problem, we can always go back later and add page caching.
Docutils
To support RST, the first thing we have to do is make the Docutils
package available to our running code. The easiest way to do that is to
visit the Docutils web site, download the source code, unpack it, and
move the docutils subdirectory (and all its contents) into our blog
directory. When we later upload the application to GAE, the Docutils code
will get uploaded, too.
Docutils also looks for a roman.py file, which isn’t present in
the GAE Python environment. There’s one in the Google App Engine
source directory (which you downloaded); copy the roman.py file
from there into the top directory of the blog.
Translation code
The code that actually translates RST to HTML is rather simple:
1 2 3 4 5 6 7 8 9 10 11 12 13 14 | |
The only wrinkle is the setting of the DOCUTILSCONFIG environment
variable. I determined empirically that if you don’t set that variable to
an empty string, the Docutils package attempts to read a startup file via
the codecs module, and the way it calls the codecs.open() method
conflicts with how that method is defined in the GAE Python library. (GAE
has replaced Python’s file handling routines with routines of its own, and
they’re not always 100% compatible.)
Store this code in file rst.py. We’ll then import it in our display code.
Create the Display Screens
Now we’re ready to create the display screens. There are six views to support:
- Main shows the top n articles (where n is the value of
MAX_ARTICLES_PER_PAGEin thedefs.pyfile). This screen is the main blog screen–the one a visitor sees first. - Show One Article shows a single article. It’s used when someone clicks on the link for a single article.
- Show Articles by Tag shows all articles with a specific tag.
- Show Articles by Month shows all articles in a specified month.
- Show Archive lists the titles and dates of all articles in the blog.
- Not Found is a simple screen to display when an article or page isn’t found.
We’ll also add some query methods to the Article class as we go along.
Base Template
The simplest way to build these screens is to use Django template
inheritance, which has the additional benefit of ensuring a consistent
look. Most of the HTML goes into a base template. That template defines
the basic look and feel of the display pages, with various template
substitutions like and.
However, the base template also contains template code like the following:
1 2 3 4 5 6 7 | |
and this:
1 2 3 4 5 6 | |
The blocks can be filled in by other templates that inherit from this one.
blog.py
The handlers go in blog.py, which is similar to admin.py. There’s an
initialization section at the bottom that sets up the URL-to-handler
mappings. Let look at that first:
1 2 3 4 5 6 7 8 9 10 11 | |
AbstractPageHandler
At the top of the file, there’s a base class that consolidates a lot of the
common logic. The most important method it contains is render_articles():
1 2 3 4 5 6 7 8 9 10 11 12 13 14 15 16 17 18 19 20 21 22 23 24 25 26 27 28 29 30 31 32 33 34 35 36 37 38 39 40 41 42 43 44 45 46 47 48 49 50 51 | |
This method takes:
- a list of
Articleobjects to be displayed - the original incoming HTTP request
- a list of recent articles to display (which can be empty)
- the template name to use, which defaults to the
show-articles.htmltemplate
render_articles() then puts together the list of template variables,
renders the specified template, and returns the result.
All the display handlers will use this method, which is why it resides in the base class.
Another method we should examine is augment_articles(), also in the
AbstractPageHandler class:
1 2 3 4 5 6 7 8 9 | |
This method renders the HTML for each article to be displayed (if requested), and computes the article’s path and URL.
The base class also contains a few other methods used by
render_template():
get_tag_counts()assembles the list of unique tags, associating an article count with each one. It also determines which CSS class to associate with each tag, based on the tag’s relative frequency, for use when rendering the tag cloud; this information is returned in a list ofTagCountobjects. (TagCountis defined inblog.py. It’s not shown here.)get_month_counts()returns a list ofDateCountobjects that the number of articles in each unique month/year.get_recent()gets the most recent articles, making sure the list doesn’t exceed the maximum specified indefs.TOTAL_RECENT.
(See the complete file in the source code for details.)
Not Found Page
Next, let’s get the Not Found page out of the way. The template is very simple:
1 2 3 4 5 6 | |
It extends the base template and fills in the main block with a
simple static message. We’ll use this template in a couple places.
The NotFoundHandler class is also simple:
1 2 3 4 5 6 | |
Recall that this handler is the last, catch-all handler in the list of URLs
in blog.py, so it’s automatically invoked if the incoming request doesn’t
match any of the preceding URLs.
That’s all we have to do to install a custom “not found” handler.
Main Page
The main screen requires a template and a handler. With the base template
and the AbstractPageHandler class in place, both are pretty simple.
Here’s the template, which resides in show-articles.html:
1 2 3 4 5 6 7 8 9 10 11 12 13 14 15 16 17 18 19 20 21 22 23 24 25 26 27 28 29 30 31 32 33 34 35 36 37 38 39 40 41 42 43 44 45 46 47 48 49 50 51 52 53 54 55 56 | |
The actual template that displays an article resides in yet another
file, so it can be re-used in different templates.
show-articles.html includes it, repeatedly, in a loop that
traverses the list of articles to be displayed.
The article.html template looks like this:
1 2 3 4 5 6 7 8 9 10 11 12 13 14 15 16 17 18 19 20 21 22 | |
It’s relatively easy to understand: It assumes the existence of a
variable called article that contains the article to be
displayed.
The handler for the main page is even simpler:
1 2 3 4 5 6 7 8 9 | |
It gets the list of published articles, trims it down to the maximum number of articles on the main page, renders the articles to HTML, and dumps the result to the App Engine HTTP response object.
If you did not leave the dev_appserver running, bring it up
again. Then, connect to http://localhost:8080/, and check out
your main page. It should look something like this:

The full main page image is here.
Show One Article
This screen shows a single article. It’s invoked when a reader
selects a single post (e.g., http://www.example.org/blog/id/5).
It re-uses the same show-articles.html template, but with just
one article in the list. The handler looks like this:
1 2 3 4 5 6 7 8 9 10 11 12 13 14 15 16 | |
It attempts to retrieve the article with the specified ID. If the
article exists in the database, then the code puts it in a
single-element list and tells render_articles() to use the
show_articles.html to display it.
If the article does not exist, the code uses the not-found.html
template we defined earlier to display the generic “not found”
screen.
Note that this version of the get() method accepts an id
parameter. Where does that come from? Recall the configuration for
this handler in the WSGIApplication object at the bottom of the
script:
1 2 3 4 5 6 7 | |
Note that the regular expression, '/id/(\d+)/?$ contains a group,
(\d+). Like Django, GAE maps each group into a parameter to the get()
or post() method. In this case, the string that matches the regular
expression group (the article’s numeric ID, in this case) is passed as the
first parameter to the get() method.
Show Articles By Tag
The ArticlesByTagHandler class again re-uses the show-articles.html
template:
1 2 3 4 5 6 | |
Note, however, that it’s calling a class method called
all_for_tag() in the Article class. We have to extend Article
to support this query method. That method turns out to be trivial:
1 2 3 4 5 6 | |
My original version of this method loaded all published articles and manually searched through their tags. However, in an email to the Google App Engine mailing list, Bill Katz pointed me to something I missed in the GAE docs:
In a query, comparing a list property to a value performs the test against the list members:
list_property = valuetests if the value appears anywhere in the list.
This is convenient and more efficient than my original solution.
Show Articles By Month
By now, you should be getting the hang of this.
Next, we have to write a handler that’ll produce a page of posts for a given month. As with the tag handler, the month handler is trivial:
1 2 3 4 5 6 | |
Again, though, it calls an Article class method we have yet to write:
1 2 3 4 5 6 7 8 9 10 11 12 13 14 15 | |
This method chains query filters to the query returned by
Article.published_query(). The filters ensure that the returned articles
are the ones published within the specified year and month.
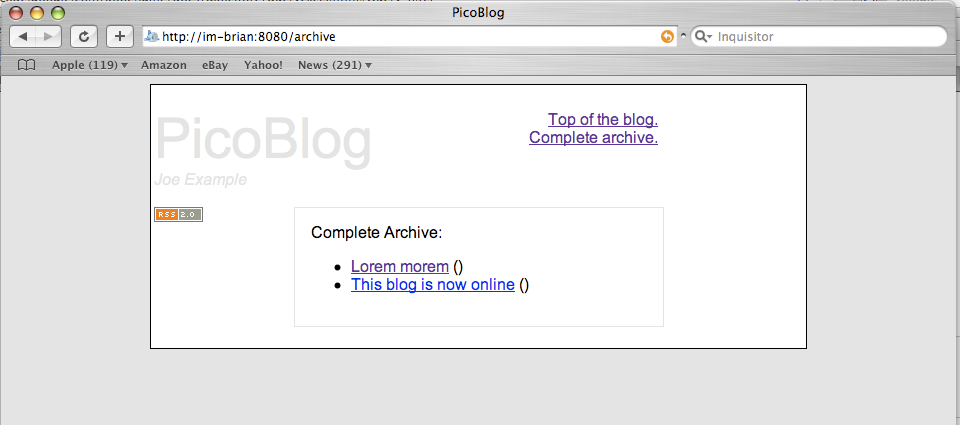
Show Archive
This page shows the titles of all published articles, in reverse chronological order. I chose to make this page even simpler than the other pages: It lacks the tag cloud, recent posts, and posts-by-month sections in the margin. The template is trivial:
1 2 3 4 5 6 7 8 9 10 11 12 13 14 15 | |
And the handler is, once again, trivial:
1 2 3 4 5 6 7 | |
Note that ArchivePageHandler passes an empty list for the “recent” posts
(since it won’t be used) and the archive template.
Here’s what the archive page looks like with our two articles in the archive:

The full archive page image is here.
RSS Feed
Any decent blog supplies an RSS feed, so we should do that, too. Of course, that’s simply a matter of writing a template and a small handler. By now, the handler should look pretty familiar:
1 2 3 4 5 6 7 8 | |
The template is simple, too:
1 2 3 4 5 6 7 8 9 10 11 12 13 14 15 16 17 18 19 20 21 | |
Deploy the Application
Test the application using dev_appserver; when you think it’s
ready, it’s time to deploy it. From within the blog’s top-level
source directory, run this command:
appcfg.py update .
That’ll upload your application to your Google App Engine account.
If the application name is picoblog, then your live application
will appear at http://picoblog.appspot.com/.
Handling Static Files such as Images
Of course, a blog should be able to display images. Since our new
blog software doesn’t support image upload, how can we use images?
The answer is simple, if slightly clunky: Put any images you want
to use in your picoblog/static directory. Then, use appcfg.py
to update the live application; appcfg.py will copy those images
up to the Google App Engine server, where you can use them.
For instance, assume you have a picture call foo.png that you
want to use in a blog article. Here’s how you might deploy it:
1 2 3 | |
Then, you can use the reStructuredText .. image directive to pull
it into an article:
.. image:: /static/foo.pn
   :width: 180
   :height: 150
Previewing a Draft
There’s one last feature to add: The ability to preview a draft article without publishing it.
With this software in place, you can already do that by using a
separate browser window or frame. For instance, suppose you’re
editing a new article, and its ID happens to be 53. In another
window, you can surf to that ID directly, using the URL
http://picoblog.appspot.com/id/53/.
But it might also be nice to preview the article in the same window where you’re doing your editing. That turns out to be trivial to implement: Merely go back to `The Edit Screen Template`_, and add these lines right after the end of the form:
1 2 3 4 | |
Now, you’ll always have a preview frame underneath the edit controls.
Enhancements
Now that you have the basic blog in place, you can start to add other enhancements, such as:
- Support for Pygments syntax coloring.
- Support for Google Analytics, which is useful for analyzing logs and traffic.
- Image uploading.
- A more individual theme.
- etc.
In Closing
In this (long) tutorial, we built a simple blog using Python and Google’s App Engine. The code represented in this article is very similar to the code that runs this very blog; it’s certainly effective, even if it lacks certain bells and whistles right now. With any luck, you now have a better understanding of what it means to build an application on App Engine.
Feedback
I welcome feedback. Feel free to submit a comment, below, or drop me an email with comments or corrections. I’ll update this article with any good stuff I receive.
Related Software
Update: 28 November, 2010
A friend notes that David Jonathan Nelson has created an App Engine Blog (AEB) project by forking picoblog. AEB “seeks to provide a near WordPress quality blog engine that runs on Google App Engine.”
Related Brizzled Articles
Additional Reading
- Experimenting with Google App Engine, by Bret Taylor.
- Building Scalable Web Applications with Google App Engine (presentation), by Google’s Brett Slatkin.
- Google App Engine documentation